If you’re reading this, it’s likely that you crave to know how to get started in woodworking. You may have also witnessed how fulfilling it feels to complete a woodworking project. In that respect, you’re right as woodworking can be fulfilling and just about everyone feels some sense of accomplishment building something with their hands.
This post will serve as a guide to getting started as a woodworker. It will assume that you know nothing about woodworking and would like to start at the very beginning. Here, the basics of woodworking, types of woodworking, tools to get started, and simple projects to get started. The common misconceptions you may have about woodworking will also be addressed, as well as, tips to get started.
The Basics of Woodworking
Starting from the very beginning, woodworking can be defined as the skill to make items from wood through the cutting, shaping, and joining of wood. The skill is used to make decorative pieces such as delicate sculptures from wood through carving or to make sturdy cabinets through joinery and carpentry.
The definition also shows that woodworking consists of different branches or methods that can be applied to build useful pieces using wood. The different types of woodworking are also sometimes used together in completing a decorative piece.
Form many people or beginners, the craft of crafting wood may seem physically challenging as even the average two by four can be heavy to carry around but this isn’t the case. Woodworking rarely involves lifting heavy logs of woods like in the old days or even a two by four. Hobbyists also work at whatever pace they set which makes it more of a cool way to view the works of your hands and challenge your creativity. Woodworking tools also offer support in diverse ways which reduce the workload associated with woodworking but how tools help will be discussed in other sections.

Who is a Woodworker?
Anyone interested in crafting or making something with wood is a woodworker. When it comes to woodworking, there are no stereotypes. The hobbyist building a birdhouse with the limited tools and resources he has is a woodworker, that woodworking teacher at your high school is or was one. The woman carving fine pieces from a small chunk of wood is also one. Woodworking is a hobby that confers a calming influence on its adherents which is why everyone can be one to the extent they choose.
The professional carpenter, carver, or furniture maker is also a woodworker. The difference is that the professional takes woodworking as a job and earns a living from it. The professional may also be more experienced and have some woodworking certification under their belt but he or she is first and foremost a woodworker.
Types of Woodworking
Like most professions or crafts, woodworking is extensive in terms of its nomenclature. The diverse types of woodworking are one of the major reasons why people ask if a carpenter or a woodcarver can be called a woodworker. As stated earlier, the answer is yes! But different niches apply.
The different types of woodworking include the following:
Dimensional Furniture Woodworking
Your local carpenter who churns out domestic furniture and handles your repair work is a dimensional furniture woodworker. The Dimensional furniture woodworker is experienced with building furniture such as chairs, doors, etc. from scratch. These types of woodworkers are also excellent at handling restoration jobs that involve repairing broken down furniture or refitting old furniture with new features.
Cabinetry

To understand what cabinetry is, a definition of a cabinet is needed as this niche refers to woodworkers who make cabinets. A cabinet is a box-shaped piece of furniture with doors or drawers. This makes the woodworker who builds the cabinets mostly found in kitchens, bedrooms, and bathrooms a professional specialized in cabinetry.
Finish Carpentry

Sitting on bare wooden sofas or making use of a table set straight from the workshop would be jarring for anyone. This is because of the woodchips cutting wood produces and the discomfort of resting on plain wood. Finish carpentry focuses on handling the finishing tasks needed to make wooden structures comfortable. This includes saw dusting, shaving, smoothening and adding upholstery to finished wooden structures.
Woodturning

The craft of using the wood lathe with hand-held tools to cut symmetrical shapes on wood. In this case, the woodworking process a wood lathe is used to generate different forms. The woodworker who turns wood is known as a turner.
Woodcarving

Woodcarving involves the use of a hand tool, which could be a knife or a chisel, to carve decorative items or wooden figurines. The woodcarver serves as the sculpting niche of woodworking.
Wood Mosaics

Wooden mosaics generally refer to artworks made from wood that can be hung on wall surfaces. Woodworkers make use of hand tools to carve, cut, and design these art pieces. A wood mosaic can also refer to the decorative designs seen on doors and other wooden structures. A woodcarver also has the capacity to create mosaics out of wood which highlights how intertwined the different niches in woodworking are.
Types of Woodworking Defined by Tools
Another method for categorizing woodworking disciplines or types involves analyzing the type of tools a woodworker works with. It also showcases the different ways people approach woodworking as a craft. The different types of woodworkers according to the tools used include:
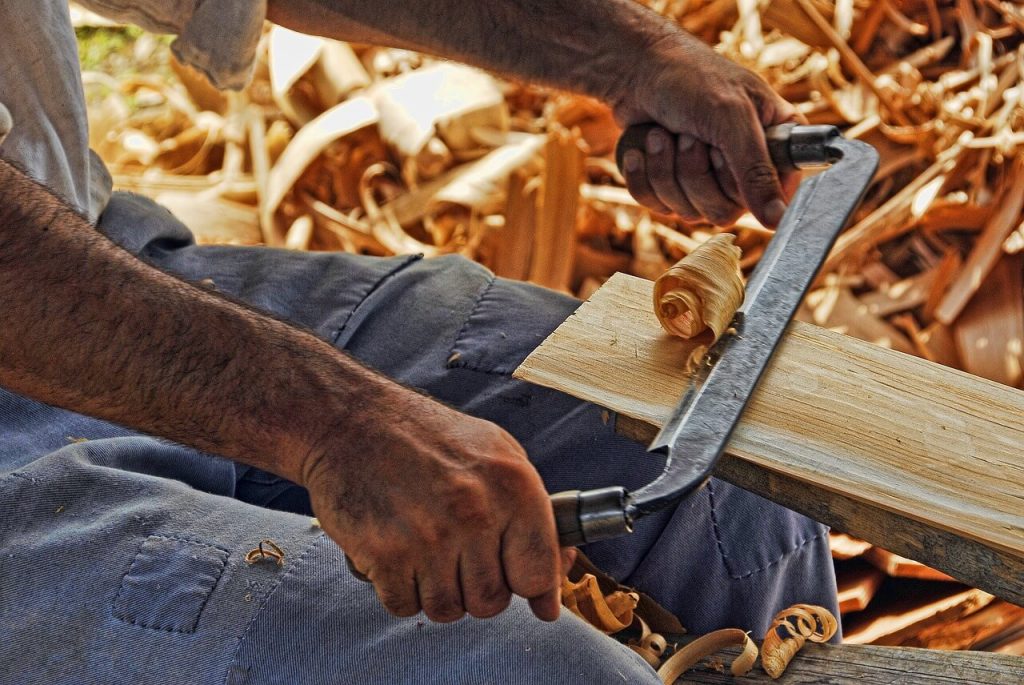
Hand Tool Woodworking
The hand tool woodworker makes use of tools such as scrapers, planes, chisels, and knives to craft designs of objects from wood.
Power Tool Woodworking
Today, the use of power tools is the popular approach to crafting items with wood. There are currently power tools for every woodworking process. Examples include routers, jigsaws, drills, sanders.
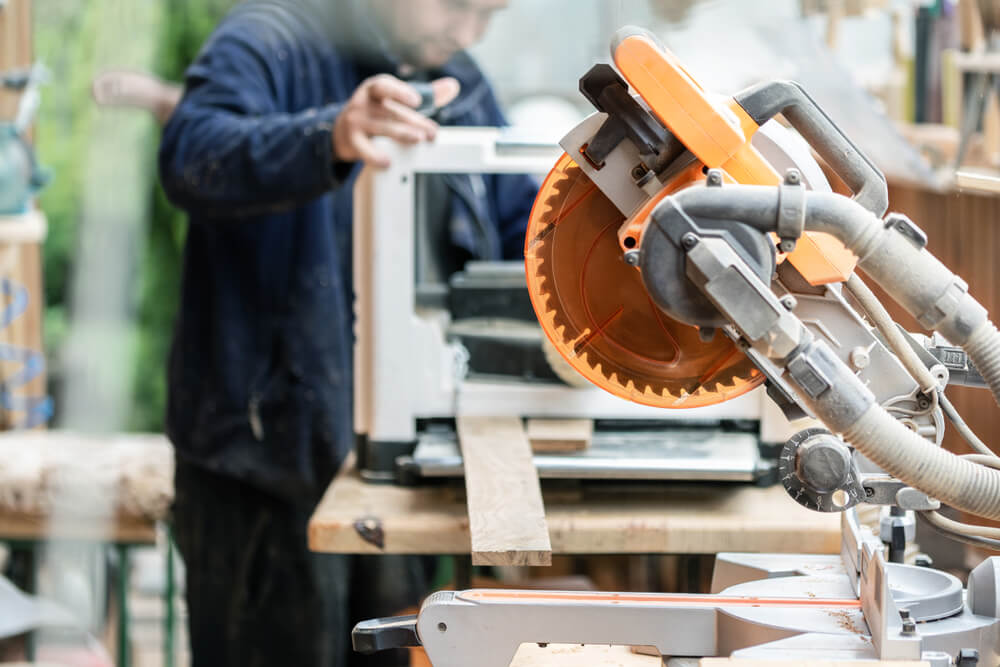
Approximately 90% of woodworkers make use of power tools as they speed up the working process.
Digital Woodworking
Woodworking is being digitized and the digitization process is being executed by computer numerical control (CNC) machines.
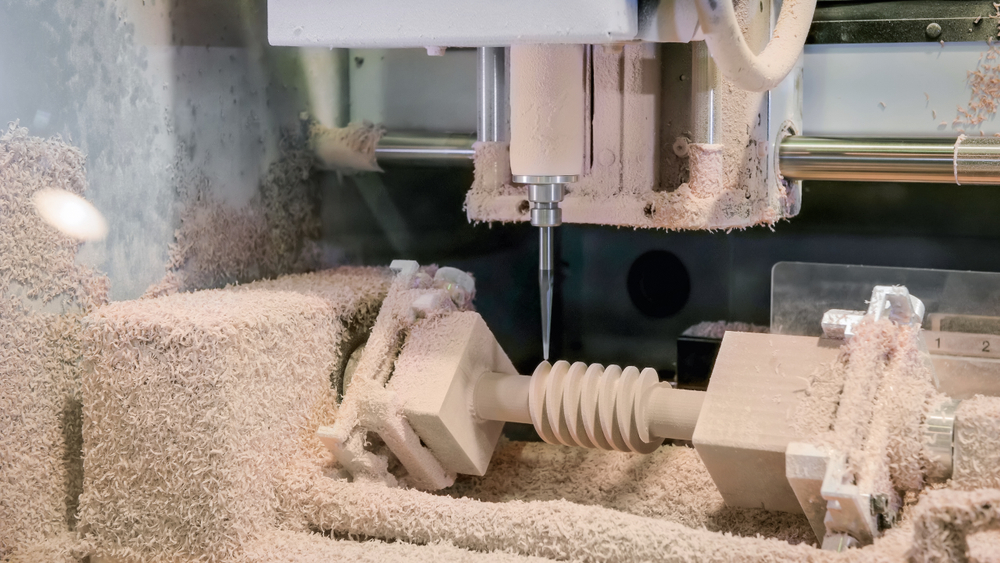
These machines make precision cuts on wood, as well as, other materials. With digitized CNC machines, designs are fed to the machine and the machine takes it from there and cuts patterns into wood.
Other tools used in digitized woodworking include laser cutters that deliver precise cuts. Digital woodworking is generally used by commercial woodworking outfits due to the cost of purchasing woodworking machinery.
Blended Woodworking
The combination of hand tools or power tools with any other type of tool creates a blended process for woodworking. Blended woodworking is the common approach most woodworkers employ in their craft.
The Basic Woodworking Tools to Have
The old saying ‘the tools make the worker’ also applies in woodworking. The quality of woodworking tools you have could determine if you continue with woodworking or sign out after a few tries.
The basics tools for woodworking refer to tools that you can continue using as you grow into your craft. They are not beginner tools but the tools every woodworker keeps within their workstation. The basic tools you’ll need to get started include the following:
- Power Jointer and Thickness Planner – The power jointer and thickness planner are tools used for smoothening rough surfaces. These are power tools and they are more effective and quicker for preparing wooing surfaces.
- A Handsaw – Handsaws are excellent tools for straightening edges, 8cross-cutting, bits and wood pieces to size. A Handsaw is not a power tool.
- Jigsaws – Jigsaws are power tools that enable versatility when cutting wood. You can choose to purchase a cordless or corded jigsaw depending on your budget.
- Combination Square, Tape Measure, and Crayons – These are supporting tools that simplify design, measuring, and marking wood surfaces.
- A Power Drill – A power drill is a boring tool used for creating holes in wood.
- Rasps, Files, Smoothing Plane – These tools are finishing tools used in smoothening surfaces, straightening edges, and removing wood chips.
- A Chisel and Hammer
These tools are a mixture of hand tools and power tools. The average woodworker is expected to alternate between using both through his or her career.
5 Woodworking Projects for Beginners
The best way to get started and gain some experience is doing the actual work. There are a plethora of woodworking projects out there you can start with but to simplify your learning process, 5 Woodworking projects for beginners have been included below.
A Simple Wall Shelf
The shelf is basically a small aesthetic wooden structure that can serve as a holder for a few books or other domestic items. Making the simple wall shelf is an easy project and should get you started while motivating you to see woodworking as something you could pursue as a hobby.

The tools and materials needed for this project include:
- A drill
- A reciprocating saw
- Handsaw
- Orbital sander
- Pallet
- Sandpaper
- Drill bit
- 1 5/8inch Wood screws
With these tools in hand, you can build a simple shelf using the following steps:
Step 1 – Start the process by cutting your wood to size using the reciprocating saw. The wood should be cut so you have a base, back, and sideboards for the shelf.
Step 2 – drill holes on the pieces that will support the wood screws.
Step 3 – Put the pieces together by screwing in the wood screws into the holes you made.
Step 4 – Finish by applying sandpaper to the surface of the wood to ensure it is smooth. You can also choose to paint the structure to give it a more appealing look.
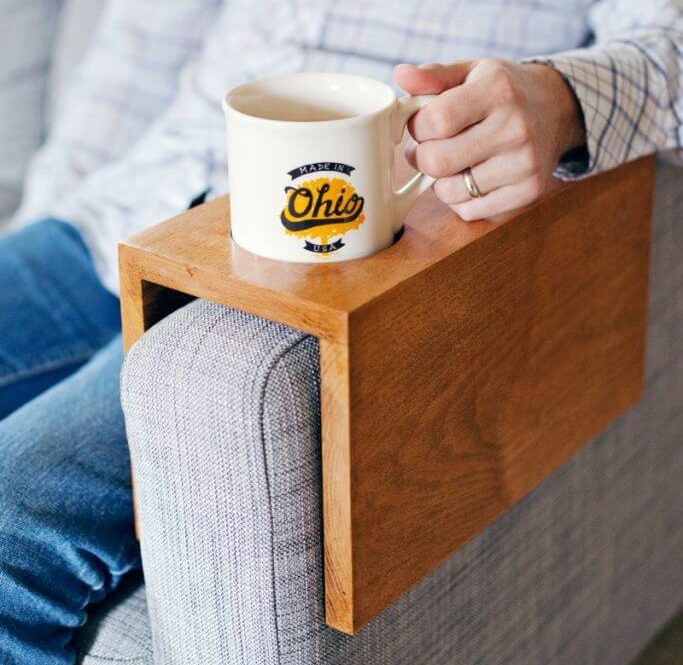
A Sofa Sleeve and Cup Holder
The making of a sofa sleeve that spots a cup holder is a more difficult task than the first but it gives you the opportunity to put the tools you have to the tests.
The tools and materials you will require for this simple project include:
- Clamps, 8 inches long or more
- A hole saw
- Pencil
- Power drill
- Wooden board and plywood
- Wood glue
- Sandpaper
- Polyurethane
- Steel wool
With your tools in place, apply the following steps to build the sofa sleeve:
Step 1 – Measure the arms of the chair where the sleeve will be used. These measurements should be used to determine the dimensions of the three pieces of wood needed for this project.
Step 2 – Prepare the wood and cut it according to measurement using a saw. For the upper surface, apply the drill and hole saw to ensure the circular whole cut can serve as a cup holder.
Step 3 – Sandpaper the cut pieces and proceed to assemble them using wood glue and wood screws to ensure the built structure is solid.
Wooden Media Box
Media boxes are the structures that house media items such as speakers, video games, TV boxes, etc.

Building a simple media box from scratch is a process that involves the use of the following tools and materials:
- Two Clamps
- Saw
- 3 pieces of any wood
- Sanding block
- Wood glue
- Clear spray finish
with your resources you can apply the following steps to build a wooden media box:
Step 1 – Prepare the pieces of wood by sanding their surfaces and ensuring they meet the dimensions you want for your project.
Step 2 – Put the pieces together using the Clamps you have and the wood glue. This ensures they’re stuck fast and the media box is sturdy enough to support multiple loads.
Step 3 – Smoothen the top surface with the sanding block once again and apply a clear spray finish. The spray gives it that glossy premium look that elevates the beauty of any room you choose to place the media box.
Address Number Wall Fixture
A wooden address fixture that showcases the number of your apartment is a basic woodworking project that has practical uses. The fixture also comes with a small shelf where plants can be placed to spice up your number code.

The tools required to make the address number wall fixture is:
- A drill
- Electric sander
- Cedar board
- Cedar fence picker
- Metal address numbers
- Wood stain
Step 1 – Start the process by drilling holes into the cedar board. These holes will serve as the support for the cedar fence picker.
Step 2 – Fix the cedar fence picker and you have your address fixture. The next step is to use glue to stick the numbers on the larger surface of the cedar board.
Step 3 – With your address number fixture in place, the final step is putting a plant into the small shelf and fixing it onto your door or external walls.
The Multiple Candle Holder
One of the fun things about woodworking is the ability to create decorative pieces out of seemingly discarded wood. This candle handle is one such example and it requires hollowing a block of wood in multiple places to make your candle stand.

The tools and materials you will need for this project include:
- A saw
- A drilling tool
- A chunk of wood or any old plank that’s still solid
- Hammers
- Horseshoes
- Nails
- Protective finish
With these tools in hand, the next steps are needed to build the candle stand.
Step 1 – Start the process by drilling large hollows within the block of wood. These hollows should be a nice fit for the candles you normally use.
Step 2 – Drill holes at both sides of the wooden block or plank. These holes will serve as the fitting points for the horseshoe. In this case, horseshoes become the legs of the candle stand. They should be placed in an upside-down position which leaves the two ends of the horseshoe serving as supports.
Step 3 – Hammer the horseshoe in place and clean out any wood chunks remaining within the hollow. The protective finish can then be applied onto the surface of the block. It is important that the finish be fire-resistant as this ensures the wooden candle stand is safe to use indoors.
Common Woodworking Misconceptions

In woodworking, many misconceptions are bandied around about its cost, the gender that sees woodworking as an attractive hobby or how difficult it is to become a woodworker. In many circles, these misconceptions are sometimes believed, and it is only right that they are debunked here.
Myth 1
The first misconception most people have about woodworking is that it is cheaper to do it yourself than purchasing items from Ikea. In most cases, the correct answer to this is that it depends on the project you’re executing.
If your project is something basic like a few of the highlighted examples in the previous section, building it yourself may be the cheaper option. If the item to be built is something as big as a bed or even a chair, then Ikea’s ability to churn out thousands of chairs using large-scale industrial equipment produces cheaper products. The cost of purchasing the items to build the chair such as wood pieces and power tools adds to the total overhead cost of your chair, unlike Ikea who already has a factory in place.
The time spent building chairs are also resources that add up to the total overhead cost. This means for larger projects, Ikea may be the better deal while DIY woodworking has its limitations. These are also some reasons why many see woodworking as a hobby.
Myth 2
Another commonly believed myth is that wood splinters are the cause of the majority of the injuries woodworkers face. The fact is that splinters do not top the list and most woodworkers get injured by making a few mistakes when handling hardwood. This is due to the extremely sharp edges of hardwood which can produce deeper paper cuts if handled incorrectly. Thus, the use of protective gear is always recommended for anyone interested in woodworking.
Myth 3
Woodworking is seen as a very physical activity with woodworkers banging nails with hammers every minute of the day. Although some heavy-lifting is to be expected from time to time, woodworking is an art that requires a careful touch. The use of hammers can scorch fine wood surfaces and where decorative pieces are concerned, the unnecessary use of hammers will disfigure surfaces.
The use of power tools also simplifies many processes in woodworking. Power tools are better alternatives to brute force as you can actually control the amount of force needed to make a whole or put a nail into a wooden board.
Myth 4
Another common misconception about woodworking is how many people believe getting started is expensive. The average person believes he or she needs all the power tools and machines before they can become competent woodworkers but this isn’t the case.
Smaller and mid-sized projects are easier to make and require fewer tools than more complex projects. Also, in situations where certain power tools are required, the availability of multiple vendors means you will find tools that fall within your price range online or in your local tool store.
Myth 5
Many believe a large workspace is needed when considering woodwork as a hobby. This myth is quite popular as it ties into other myths such as you need hundreds of tools and will spend much money acquiring them for woodwork. It is only logical to make the jump from needing so many tools to needing a large space to house them but this isn’t the case.
Except you are interested in exploring woodworking as a commercial opportunity, the limited space in your garage is enough to house your workstation. If you are determined to learn and be tactful, even smaller spaces than your garage would work. That being said, woodworking tools are not toys. This means they must be stored and kept safely if you are to practice woodworking within a domestic setting.
Myth 6
The process of woodworking produces dust especially if sawing is involved. Many believe the scent or sawdust in the air is harmful to the human lungs and other organs. The answer to this is yes, sawdust is harmful to breathe in for prolonged periods and woodworkers must take precautions when sawing to ensure they do not breathe it in.
So, this isn’t actually a myth but with safety or protective gear in place, sawdust no longer becomes harmful and this leaves you to do your work however you choose.
Woodworking Tips for Beginners
As with every occupation or hobby, tips exist that simplify the work you have to do and this is the same for the woodworker. There are hundreds of woodworking tips out there from different professionals and here an attempt to highlight the more important once will be made.
Sanding Tips
Making use of a sanding block produces more efficient results and speeds up the sanding process. If you can afford a power sander, some cost below $20, it eases the sanding process and works best in removing deep scratches from wood surfaces. To remove deep scratches, angle across the grain at 45 degrees for the first sanding.
Keep a Clean, Orderly Workspace
Rise above the clutter by always ensuring your workspace is free of unused tools and dirt from previous projects. This makes finding the tools you need easy, reduces injury, and enhances productivity.
Keep Blades Sharp
Dull tools such as the chisels and planes you use consistently reduces productivity in different ways. They can either increase the time needed to accomplish a task or become hazardous to use. Tools sometimes get chipped or nicked when used. If this occurs, grinding helps remove these nicks and the application of a wet stone to the tool surface ensures the tool edge isn’t dull.
Light up your Shop
A well-lit shop is one that enhances productivity and safety within your workspace. This is why many power tools are being equipped with LED lighting to ensure every surface of a piece of wood is properly lit while working. You should integrate the use of overhead lighting and focused lighting to light up your workspace.
Common Mistakes to Avoid
There is a learning curve to woodworking and it is expected that mistakes will be made as you progress from basic woodworking activities to more tasking ones.

The common mistakes beginners make and how they can be avoided include:
- Measurement mistakes when cutting – The thickness of a blade, also known as kerf, reduces the length of wood after a piece has been cut. This is why many beginners find the length of a piece of wood they cut shorter than their original measurements. The kerf of the blade shortens the wood. So, it is recommended that you first apply the blade on another piece of wood, measure the kerf and include it I your original measurements.
- Using the wrong tool – Woodworking is a craft surrounded by specialty tools which actually makes your work easier to accomplish. In situations where the wrong tool is used, this can derail the whole process by causing blowouts and the application of too much force. It is important to know the tools needed for a project and get them before starting a project.
- Burn marks – Beginners always end up surprised when they discover burn marks on wood after applying some tools. One example is the use of a router. Routers and flat blades leave burn marks which may affect the design of your piece. To reduce burn marks, ensure your blades are sharp and always cleaned before any application.
- Lazy handling – Although wood is tough, care must be taken with the surfaces of wood. Carelessly dropping tools on surfaces or dragging things across wooden surfaces leave scratches and nicks that affect the quality of your craft.
Safety Tips for Woodworkers
As stated earlier, the breathing of sawdust, the careless handling of hardwood, and a disorderly workspace can be harmful to a woodworker. The tools used in crafting wood can also cause injury which is why an understanding of woodworking safety measures is needed.

Some of the most important tips include the following:
- Use safety equipment – Although this may seem like a no-brainer to many, most people execute woodworking activities without protective gear. It is important that when working with loud power tools like routers, ear protection should be used. Your workstation must also have protective gear such as latex gloves, safety glasses, and clothes that cannot be caught in machines while working.
- Avoid using things that impair judgment – This includes prescription drugs or alcohol. Woodworking should be done when sober and in complete control. This reduces the possibility of injuries or accidents occurring.
- Disconnect power tools – Power tools must first be disconnected before changing blades bits or cleaning the tool. It is also recommended that these tools must be disconnected when leaving the shop for the day.
- Check stock for metal – Before sawing through wood, always check for metals such as nails that may hamper the process. Metal can destroy saw blades and also injure the woodworker during the cutting process.
- Do not reach over running blades – The cutting process must be completed and stopped before you attempt to remove waste or cut-offs. Running blades can cause injury to the user which is why waste should be removed using a tool or stick.
The Best Way to Store your Tools
The durability and health of your tools depend on the care they are giving and proper tool storage is a form of care.
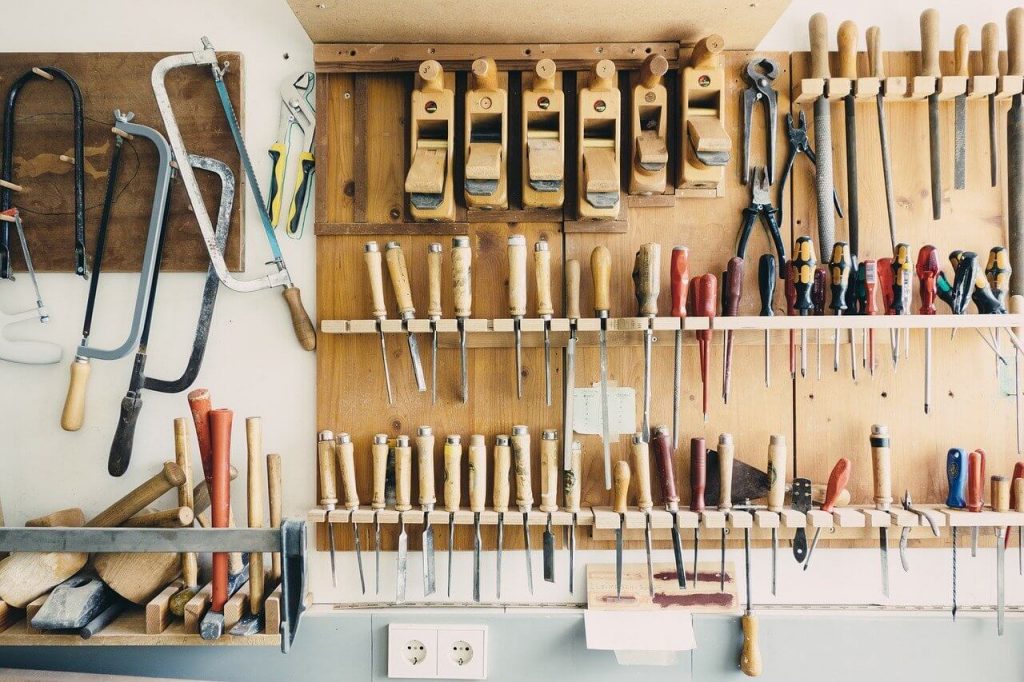
To properly store your tools, apply the following techniques:
- Tool Chest – A tool chest is an excellent way of storing hand tools and keeping them in an orderly fashion. Tool chests with multiple drawers enable the arrangement of tools that complement one another with ease.
- A Wooden Cabinet – Wooden cabinet serve as large storage houses where you can keep a large number of tools. Cabinets with transparent doors also make visualizing your available toolsets easy.
- Cabinet Workbench – Workbenches with cabinets provide extra storage space for storing tools.
- Hanging Cabinets – Hanging cabinets are great for storing tools with blades such as handsaws and other cutting tools. They are also excellent storage options for cord and cordless power tools.
In situations where you fear the effect of rust on your tools, controlling humidity is the best option for keeping your tools safe. To eliminate moisture, add moisture-absorbing gel packs in the strategic corners of your toolbox or cabinet. This will keep moisture away and stop rust.
Conclusion
Woodworking is a craft and it takes patience and the willingness to learn to excel at it. In this comprehensive guide to woodworking for beginners, all the necessary information you need to kick-start your woodworking hobby has been explored. So, go out there and get started by building the examples included here.
Resources:
[1] https://www.osha.gov/SLTC/etools/sawmills/dust.html
[2] https://www.sawinery.net/blog/woodworking-projects-for-beginners/#1_Simple_Wall_Shelf
[3] https://woodworkingformeremortals.com/what-is-woodworking-a-total-beginners-guide/