If you already have some basic woodworking tools, a router included, you don’t need to shell out several hundred dollars for a sturdy router table; you can build a DIY router table catered to your requirement. Use the tips below to build your own router table that meets your needs.
Building a DIY router table will require you to first and foremost select what you would like your router table to have. A basic router table will include at least:
- A router table-top
- A fence with dust collecting port
- A router table-cabinet
- A router table Lift
The main piece of your router table being the router itself, you should make sure that your insert-plate and your router-lift will be compatible with the router table you are about to build.
It is also worth restating that building a DIY hybrid router table has to be on your radar if you do not intend to build all parts yourself. Many will choose to build the cabinet only.
Building a DIY Router Table Top
A good router needs a sturdy top, which should be anywhere from 1-1/8” to 1-1/2” thick. The thicker your router tabletop, the less likely it is to sag. This is important for precise joinery work like lock miters or dovetails because errors of even 1/64” can cause big problems.
Choose a Flat Material
Even thick materials can bow or cup, so be sure to select the flattest stock available from your home center or lumber supplier for your router tabletop. Often, you’ll find this at the very bottom of a bunk, where the material on top has kept it flat and dry. Don’t be afraid to dig through a stack to get to the good stuff; it’s worth it.
Consider Phenolic or UHMW
Although they’re much more expensive than MDF or particleboard, hard plastic sheets like phenolic or UHMW make excellent router table tops that will last longer and provide better performance. UHMW is an ultra-low friction material that will allow your parts to slide effortlessly across the tabletop. Phenolic is commonly used for commercial woodworking fixtures, but will definitely cost more.
Use MDF or Particleboard Instead of Plywood
You’ve already learned about the importance of choosing a flat material for your router tabletop, and MDF tends to be the flattest sheet good you can buy. Particleboard is also a good choice, but either one will almost certainly be flatter than a typical sheet of plywood. The faces of these materials can be somewhat rough, so you should plan to laminate them.
Laminate Your Table Top
If you’re going to build an MDF or particleboard top, you should adhere a sheet of plastic laminate to the top surface to reduce friction and protect the top from moisture. You can buy a 4’ x 8’ sheet of Formica or another brand of plastic laminate from your home center. Spray a thin layer of contact adhesive on the backside of an oversized piece of laminate and the top face of the MDF or particleboard, let the glue get tacky, apply the laminate and trim away the excess.
Band the Edges for Extra Durability
Raw MDF or particleboard edges are ugly, but they’re also fragile. The last thing you want in a shop fixture that you’re going to use as much as a router table top is a weak edge that’s prone to chipping or breaking. Apply PVC edge banding or t-molding to all four edges of your top with contact adhesive.
Cut a Recess for Standard Router Insert Plates
A router insert plate makes it easy to install a router in your router table, so your tabletop should have a cutout for a standard insert plate. You can find the dimensions for the cutout in any woodworking supply catalog that offers inserts. If you prefer, you can even make your own insert out of ¼” acrylic or another flat piece of plastic-like phenolic.
Make Your Top Removable
Sometimes you need an extra sawhorse or workstation in your shop, and by making your top removable, you can use the stand when the need arises. Drill four matching holes in the underside of the top and the stand. Then place removable dowels into the stand and drop the top into place.
Add a Miter Slot for Versatility
With a good router table, you can make all sorts of joints, but you’ll often need an accessory like a coping sled or miter gauge. To accommodate jigs for door making, joinery, and other tasks, cut a miter slot a few inches from the front edge of your router tabletop. It should span the entire length of the top and be open on both ends so that you can slide jigs into it.
- DIY Guide: How To Treat Wood for Outdoor Use
- The Ultimate Guide to Choosing the Best Knife Handle Wood
How Much Will It Cost To Build a Router Table Top?
No matter what material you choose or how you go about building your own top, you’ll undoubtedly spend less than you would on one that’s commercially made. A flat, sturdy top should cost you between $40 and $200. To stay at the lower end, build your router tabletop out of MDF and plastic laminate
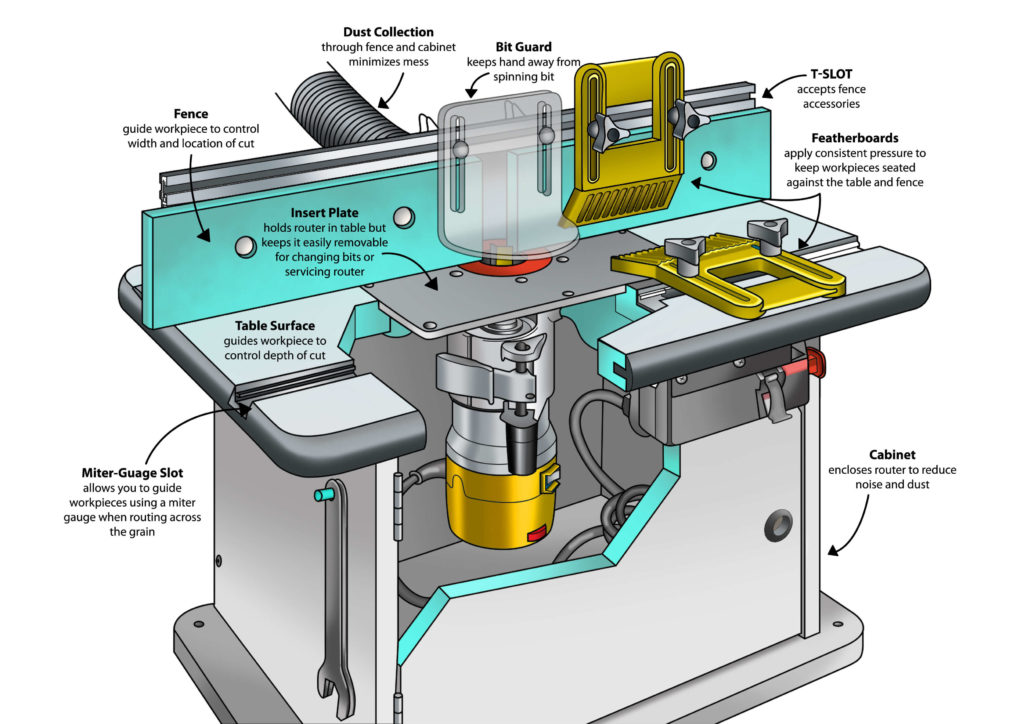
The Router Table Fence
No router table is complete without a good fence, which you can make yourself or buy from a retailer. Take a look at the fences online and in woodworking, catalogs to see how they connect to a router tabletop. Some require holes or slots in the top, and you’ll have to cut those yourself.
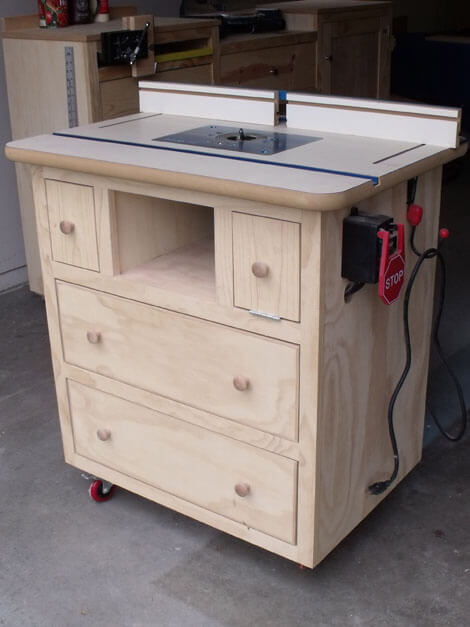
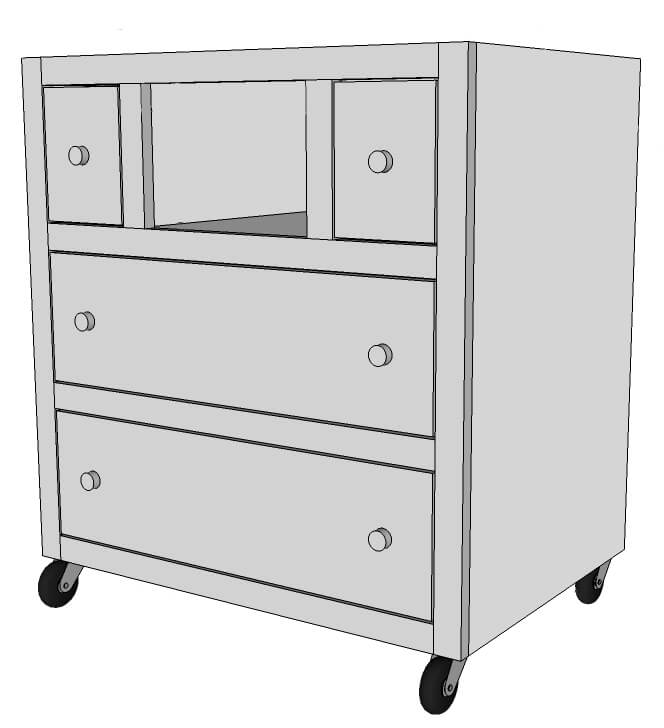
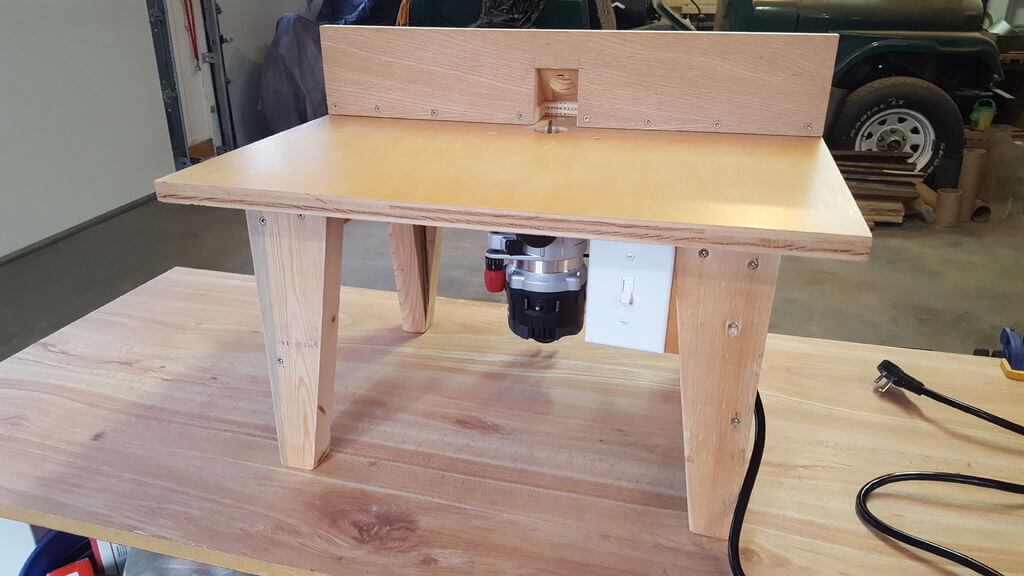
Build a DIY Router Table Cabinet
Your router table cabinet can be as complex as the following image, or can simply be 4 legs on top of which your router table will stand.
It is also primordial to know in advance what type of cabinet you will build considering your woodworking skills.
Here are some examples of DIY router table designs
It is up to you to find the one router table that potentially will have you enjoy the process of building it yourself.
Router Table Plans
You can find some plans on the following pages.
- crestonwood.com
- bobsplans.com
- ana-white.com
- joshmt2012
You Can Buy a Good router Table Online
In case you’re wondering what a good factory-built router table costs, take a look at the